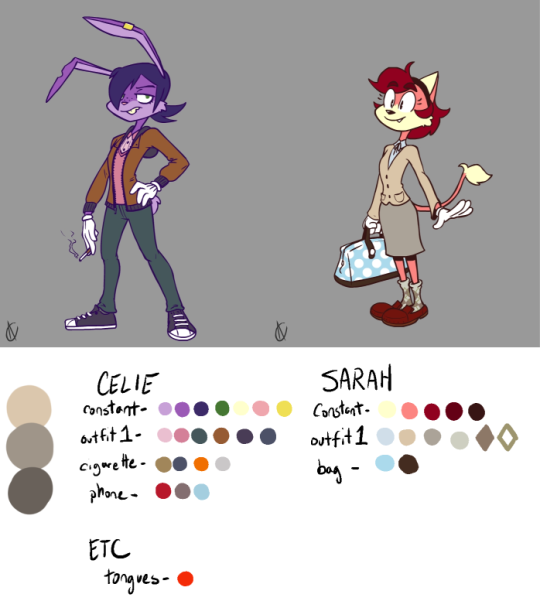
1) Palettes. If you have characters, objects, types of lighting, whatever that’s going to be showing up frequently, make something you can keep off to the side and Eyedropper to keep things consistent.
First thing Atrox did before we started working on pages was made references for Sarah and Celie for both our benefits! I originally just grabbed colors off these, but even that proved to get kind of tedious, so I eventually made the charts below it. The three brown colors on the left are my palette for the lighting and shading. (Note to self: make palette charts for background elements that come up a lot, like those darn bus seats haha)
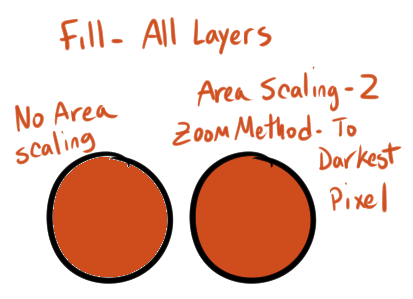
2) Make flatting go by way quicker with the fill tool. Once I figured out to do this, it sped up the process A. LOT. Here’s an example, as well as the settings you will need (I use Manga Studio 5 EX, they should be the same for Clip Studio Paint):
As long as you’ve got closed off line work (if not, close off the gaps on your flats layer, it’ll work just the same), it should work for most of your coloring. Make sure to go through and check for/manually fill in any little corners or pointed ends the fill tool couldn’t reach.
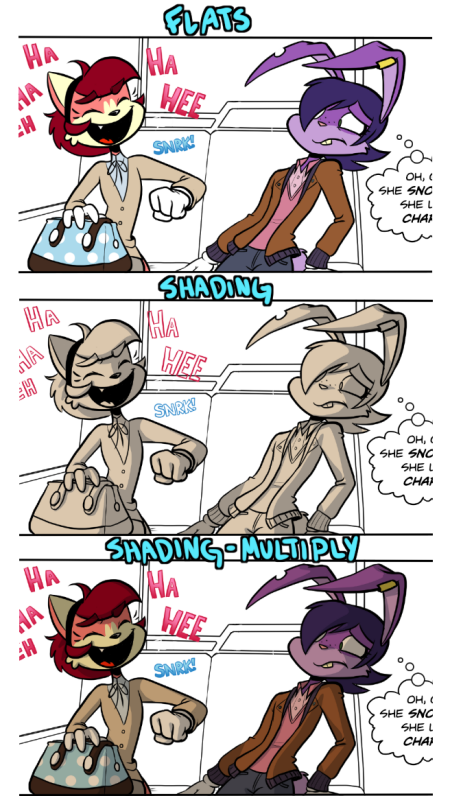
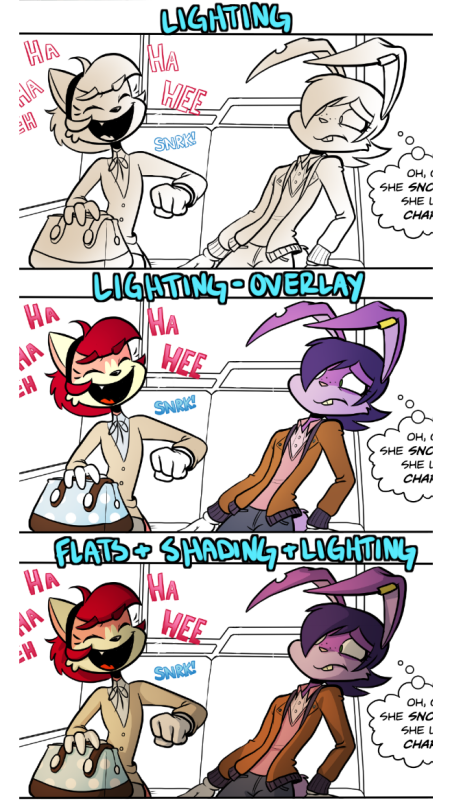
3) Mixing gradients/airbrushing with cel shading. “EW GROSS GRADIENTS!” I know, I know. But sometimes cel shading by itself is a little, well… flat. Anyway, take a look: