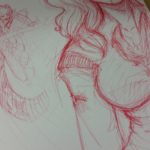
Here are a couple of crappy photos of doodles from work!
My boss told me today that he likes seeing the sketches as they evolve throughout the day. I told him that it helps me think and he totally understands.
aw yis
I am pretty sure that the guy behind me on the train was reading my Sonic rp post as I was writing it…
I wonder if he liked it.
I am pretty sure that the guy behind me on the train was reading my Sonic rp post as I was writing it…
I wonder if he liked it.
I totally got hit on while waiting for the train this morning. It was awkward. And the second someone else sat near us, the guy got up and left.
I just feel weird now.
I totally got hit on while waiting for the train this morning. It was awkward. And the second someone else sat near us, the guy got up and left.
I wanted to share what I wrote for this morning’s word war (I won, btw):
Limerick gave me a pointed look. I frowned. “What?” “You’re doing it again.” I looked at my hand. It was resting on the back of Limerick’s shoulders. “What, this?” His yellow eyes narrowed to thin lines of gold in a sea of black. “What do you think?” I petted him again, fingers dipping into the thick fur between his shoulder blades. “Cats usually like being petted, don’t they?” “You have no idea about cats, do you?” I actually didn’t know, since Mom never let me have a pet before, but shrugged. “You’re purring, anyway.” He blinked, eyes going from gibbous to full moon in surprise. “I – what?” And then he stopped to listen to himself, and there it was: a deep, rumbling purr in his chest. Limerick’s eyes went half-moon and glared up at me. “Stop. Stop this at once.” “You like it!” I stroked down the line of his spine. “Doesn’t your master ever pet you?” “No, of course not. Have a sense of propriety; I’m a Familiar, not a normal house cat!” “Sorry,” I said, but kept petting anyway. He didn’t move. Soon, he settled into a loaf next to my leg, eyes completely closed. “You’re a terrible person, Salmon Coal,” Limerick said. “Yeah, I’m the worst.” I moved up to scratching behind his ears, then down to his neck, rubbing the loose skin over muscle. “Ah, yes, scratch right at my neck there – thank you.” “You’re welcome.”
This is a reminder that I have a writing blog – gabapplewrites – and occasionally post bits of prose on my current novel’s tumblr account, salmoncoal